


Why Most Carriers Never Actually Test Their Holster
By: Christopher J. Burns
A police chief in Georgia shot himself in the leg while re-holstering his duty weapon. The cause was not a mechanical failure or a training gap with the firearm itself. His fleece jacket had dropped into the holster mouth, caught the trigger during re-holstering, and fired a round into his thigh. He survived. Not everyone does.
A CCW Safe study of 300 negligent discharge incidents over a 24-month period found that roughly one-third resulted in a death. With approximately 22.3 million concealed carry permits active in the U.S. as of 2025, the vast majority of new carriers have never been taught any structured holster validation protocol before strapping on a loaded firearm.
There is a difference between a holster that feels good at the gun store counter and one that performs when your hands are shaking, your heart rate is at 160 bpm, and you are drawing from a position you have never trained. This protocol is derived from LEO and FLETC training doctrine, not opinion. It applies equally to duty carry and civilian concealed carry.
The dry-fire-first rule applies to every off-range step below: use inoperable Blue Guns or a cleared, verified-safe firearm with all live ammunition removed from your person and belt.
Step 1: Retention Calibration and the Inversion Test
The correct retention standard is straightforward: your pistol must not move when the holster is inverted and shaken vigorously. At the same time, the draw stroke must remain smooth and consistent, not a slow, hesitant pull.
This distinction matters more than most people realize. A slow or hesitant draw will make retention feel tighter than it actually is, masking a real-world problem. If you test retention with a cautious tug instead of a confident, quick draw, you may believe your holster is secure when it is not.
Adjusting Kydex Retention Screws
For Kydex holsters, adjust retention screws in half-turn increments. Test the inversion shake and a full-speed draw after each adjustment. You are looking for the balance point: the firearm stays locked in place under gravity and movement, but releases cleanly when you commit to the draw stroke.
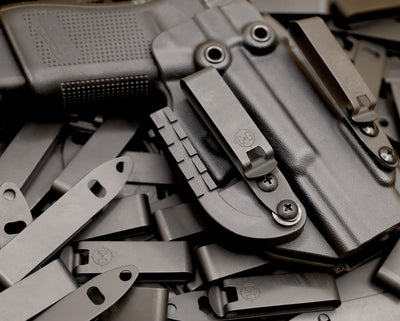
Kydex's material properties give it a significant advantage here. With a flexural modulus of 2,800 MPa, a Rockwell hardness of R 90, and a forming temperature of 300–375°F, Kydex maintains its molded shape under stress and will not warp sitting in a hot vehicle the way leather will over time. That shape stability is what makes consistent retention possible.
The Aftermarket Component Check
Before any live-fire testing, verify that aftermarket triggers, non-OEM parts, installed optics, and weapon-mounted lights all clear the holster mouth properly. This step is not optional. A documented negligent discharge at KR Training involved an experienced shooter whose aftermarket trigger center part worked loose, got sideways in the trigger guard, and caught the holster mouth on re-holstering, causing a discharge with the shooter's finger completely off the trigger.
After confirming component compatibility, run 200–300 dry-fire draw repetitions to break in the new Kydex holster naturally. This is not busywork. It seats the retention surfaces, builds muscle memory specific to this holster, and gives you enough repetitions to identify any binding or inconsistency before you introduce live ammunition.
Step 2: The Tree Pull Disarm Simulation and Post-Disarm Function Check
Veteran LEO trainers at Police1 and Police Magazine developed a formal holster torture-test protocol that includes the Tree Pull Test. The procedure is simple and brutal: strap your duty belt around a tree, then perform three one-second jerk-and-pull attempts from the rear, side, and front angles to simulate an active disarm attempt.
The pass criteria are absolute. The firearm must remain fully seated in the holster through all three pull directions. Any movement, any partial release, is a failure.
The Post-Disarm Function Check
Here is the step that virtually no civilian holster content covers. After the retention pulls, you must attempt a full draw and re-holster to verify that holster integrity has not been compromised by the disarm attempt. A holster that passes the inversion test but deforms or loses retention after aggressive pulls has failed the real-world standard. The holster needs to work after someone has tried to take your gun, not just before.
Level III retention holsters (friction plus two active retention devices) are specifically designed to defeat this type of force. Trained users achieve draw speeds of 1.4–1.8 seconds even with Level III retention, so the security trade-off is measured in fractions of a second, not in capability.
All disarm simulation steps must use a Blue Gun or verified-safe training firearm. Never a loaded firearm.
Step 3: Multi-Position Access Testing
FLETC and LEO qualification standards require access testing across every position an officer may encounter: standing, kneeling, sitting, on the ground, supine, prone, and seated in a vehicle. A holster that draws cleanly while you are standing square on a flat range may bind, shift, or fail to re-holster when you are on the ground or buckled into a car seat.
Civilian concealed carriers face the same real-world positions. If you carry appendix (AIWB), you need specific checks that generic holster content ignores: seated vehicle draws, garment-clearance verification at each position, and re-holstering safety under physical fatigue. These are the conditions where mistakes happen.
Non-Dominant Hand and Garment Interference
At each position, test the draw with your non-dominant hand. This is standard in LEO qualification and a critical real-world contingency. If your gun hand is injured or occupied, you still need to access your firearm.
The garment-interference check is a formal step, not an afterthought. At each position, verify that no clothing (drawstrings, fleece layers, shirt hems) can enter the holster mouth during re-holstering. This is the exact failure mode that put a round through the police chief's leg in the incident described above.
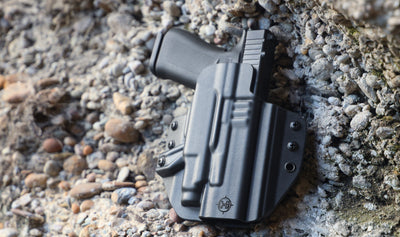
The C&G Holsters H&K CC9 OWB COVERT Kydex Holster is CNC-machined from custom aluminum molds, which delivers a consistent, repeatable draw across all tested positions. That precision matters for carriers running this exact multi-position protocol with the H&K CC9.
Conduct this entire step with a Blue Gun or cleared firearm. Move to loaded firearm only after all positions pass dry-fire validation.
Step 4: Compressed Draw Stroke Under Time Pressure
The Federal Law Enforcement Training Center (FLETC) documented a specific draw-stroke testing methodology: drills begin at 4-second par times and are reduced incrementally to 0.75 seconds to evaluate retention device deactivation under time pressure. FLETC identified unintentional discharges during stress-induced compressed draw strokes, including moving draws and draws from unusual positions, as a primary holster-related safety concern.
A Practical Civilian Version
Start at a 3-second par time using a shot timer. Reduce by 0.5-second increments. Identify the point at which your draw stroke degrades or you fumble the retention device. That is your current floor, and it tells you exactly where to focus your training.
Run dry-fire reps first with a cleared and verified-safe firearm. Then move to live ammunition under strict range safety protocols. A properly designed Level III holster adds only 0.2–0.4 seconds to trained draw times versus Level II. The holster should not be the limiting factor once you have trained to the device.
One critical point: training with a different holster than the one you actually carry builds incorrect muscle memory. As multiple training authorities stress, all timed draw practice must use the exact holster and carry position intended for real-world use. No exceptions.
Step 5: Live-Fire Validation and the Recurring Maintenance Protocol
The live-fire validation phase puts everything together. Draw from the holster under realistic conditions: incorporate movement, low light if available, and draw from the multiple positions you already tested in Step 3. Re-holster after each string of fire.
Every re-holster must be deliberate. Visually clear the holster mouth of garments. Use a one-handed re-holster technique. Never rush the re-holster under any circumstances. Speed matters on the draw. It has no place on the re-holster.
The Recurring Maintenance Protocol
Holster stress-testing is not a one-time event. Hardware loosens. Kydex wears. Carry positions change. New firearm components (lights, optics, aftermarket triggers) alter the fit. Each of these changes requires a full re-run of the 5-step protocol.
Recommended re-validation schedule:
- After any hardware change to the firearm or holster
- After 6 months of daily carry
- Any time the carry position changes
A real-world grappling retention test confirmed what experienced LEOs already know: static range testing alone cannot reproduce every force a duty holster may experience during a physical confrontation. Periodic re-validation closes this gap over time.
The standard is simple: if the holster passes all five steps, it has earned the right to be carried. If it fails any step, it goes back to the bench, not on the belt.
The Standard Your Holster Has to Meet, Before You Trust It
Retention calibration. Disarm simulation with a post-disarm function check. Multi-position access testing across every real-world posture. Compressed draw under time pressure. Live-fire validation with a recurring maintenance protocol. These five steps separate a holster you hope works from one you know works.
A holster is not proven by how it looks or how it feels on the first draw. It is proven by surviving a structured, LEO-derived stress-test protocol. With 22.3 million concealed carry permit holders in the U.S. and millions of new carriers entering the market each year, the gap between carriers who test their gear and those who do not is a life-safety gap.
C&G Holsters are designed, built, and tested by the same LEOs, veterans, and competitive shooters who developed protocols like this one. Our founder is a retired Law Enforcement Officer and Master Firearms Instructor. Every holster we make is 100% American-made, CNC-machined from custom aluminum molds for consistent retention, and backed by over 4,200 customer reviews. We do not just build holsters. We build gear that passes the test.
Sources
- How to Prevent a Negligent Discharge — USA Carry
- Sixteen Reasons Why Negligent Discharges Happen — CCW Safe
- Holster Market Size, Share & Forecast — DataIntelo
- Lessons from an Accidental Discharge — KR Training
- Torture Testing Your Holster — Police1
- FLETC Holster Study — Federal Law Enforcement Training Center
- 30-Day Dry Fire Training Plan — US Savage





Leave a comment