


Low-Maintenance Is Not the Same as No-Maintenance
You clean your gun every time you shoot. When did you last clean your holster?
Kydex is a rigid thermoplastic that resists moisture, sweat, and corrosion. It won't rot or warp like leather under normal conditions. But debris, heat exposure, and hardware wear still degrade performance over time. The "set it and forget it" mindset is one of the most common and dangerous habits among daily carriers.
Consider the scale: there are 20.88 million concealed carry permit holders in the United States, plus millions more in the 29 states that now allow permitless constitutional carry. That's a lot of holsters riding on hips, waistbands, and belt lines every single day. Holster maintenance isn't just about preserving gear. It's a firearm safety practice, plain and simple. The same standard LEOs and military personnel apply to their weapons should extend to the holster securing them.
This guide covers the three pillars that keep your Kydex holster performing: cleaning, retention adjustment, and inspection.
Cleaning Your Kydex Holster the Right Way
Here's something most carriers don't realize: a holster that feels progressively looser on the draw probably doesn't need a screw adjustment. It needs a cleaning. Dust, lint, dried sweat, and range grit accumulate inside the holster cavity over time. This debris acts like microscopic ball bearings, reducing friction against the firearm and loosening retention. A thorough cleaning often solves the problem entirely.
Step-by-Step Cleaning Process
- Remove the holster from your belt or mounting system.
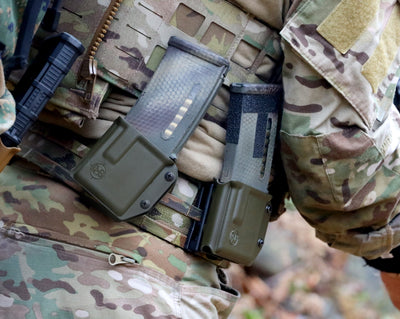
- Separate all detachable components: claws, wedges, mag carriers, and any modular attachments.
- Rinse the interior cavity with warm water to flush out loose debris.
- Apply mild soap to a soft brush or cloth and scrub the inside surfaces, paying attention to the trigger guard pocket and retention contact points.
- Rinse thoroughly to remove all soap residue.
- Air dry completely before reassembly. No shortcuts.
What Not to Use
Mild soap and water work perfectly. A vinyl cleaner like Armor All is also safe for the exterior. Harsh solvents, acetone-based products, CLP residue buildup, and Hoppes-soaked rags are off the table. Acetone can chemically attack thermoplastic, and solvent residue degrades the material over time.
Never put your holster in a dishwasher, clothes dryer, or oven. Don't leave it in prolonged direct sunlight, either. High heat softens Kydex, warps retention geometry, and alters trigger guard fit. That's permanent damage.
The Gun Oil Problem
Excess firearm oil transfers to the holster interior every time you holster up. That oil collects debris and creates a gritty paste that makes future cleaning harder and accelerates retention loss. If you're over-oiling your firearm, you're also degrading your holster. Wipe down your slide and frame before holstering.
Carry Position Matters
IWB and appendix carry holsters sit against your body all day. They accumulate more sweat and body heat, so they need more frequent attention. OWB and competition holsters collect more range dust and environmental grit. Adjust your cleaning schedule accordingly.
A good maintenance cadence for active daily carriers: quick wipe-down after every range session, monthly hardware check, and a seasonal deep clean.
Retention Adjustment: Getting It Right Without Wrecking It
Retention screws control the clamping pressure of the molded Kydex shell against your firearm's specific contact points. On precision-molded holsters built using CNC aluminum molds (like ours, now in our 6th generation of design), the mold itself creates defined contact points. The screws fine-tune that pressure. They don't create it.
The Most Common Mistake
Over-tightening. It's the number one retention adjustment error, and our team of veterans, law enforcement officers, and competitive shooters sees it constantly. Cranking screws too tight wears your firearm's finish unnecessarily, makes drawing difficult under stress (exactly when you need a clean draw most), and risks cracking the Kydex around screw holes over time.
The Right Way to Adjust
Work in quarter-turn increments only. Adjust both screws evenly. Test the draw after each adjustment. You're looking for the balance where the firearm seats with an audible click and draws smoothly without wobble.
Lock It Down with Threadlocker
Apply a small drop of blue (removable) Loctite to retention and clip hardware threads, one screw at a time. This dramatically reduces mid-carry hardware loosening. Never use red (permanent) Loctite. Allow 24 hours to cure before returning to carry duty.
Temperature and Retention
Prolonged heat exposure (think: a holster left on a hot car dashboard in July) softens Kydex and loosens retention by altering contact points. Cold temperatures temporarily increase retention and make the material more brittle. If your holster has been through extreme temperature swings, recalibrate your retention screws before carrying.
Safety First
Never clean, adjust, or test retention with a loaded firearm. Always verify the firearm is unloaded and place it in a separate safe location before any maintenance step. No exceptions.
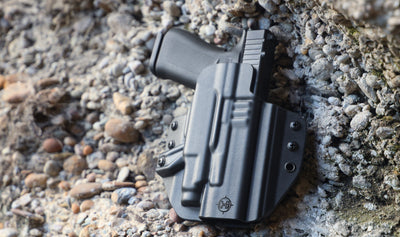
For carriers considering an upgrade or starting fresh, our COVERT/ALPHA Kydex Holster collection, available in both QUICKSHIP and fully custom configurations for IWB and OWB carry, is precision-molded to your exact firearm so retention starts correctly from day one.
Inspection: What to Look For and When to Replace
Build a simple habit: check your holster's screws and fittings every time you clean your firearm. A 60-second visual and tactile check catches problems before they become failures. We recommend periodically examining Kydex holsters and checking screws because normal wear and movement loosen hardware over time.
Your Inspection Checklist
- Cracks: Check around screw holes and tight molded curves. These are the highest-stress areas.
- Edge delamination: Run your finger along all edges. Any separation or peeling is a red flag.
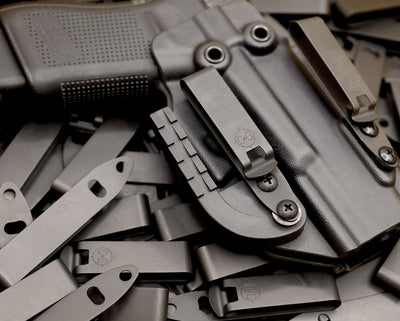
- Belt clip integrity: Verify hardware tightness and check for bending or deformation.
- Claw and wedge hardware: If equipped, confirm attachments are secure and seated correctly.
- Trigger guard coverage: Confirm full coverage. Test retention feel with an unloaded firearm.
Scratches vs. Cracks
Surface scratches are normal and cosmetic. You can address them with a soft cloth, mild soap, or fine steel wool followed by wax paste. Expanding structural cracks are a different matter entirely. Any crack that affects retention geometry or trigger guard coverage means the holster needs to be retired immediately.
Light-Bearing and Optic-Cut Holsters
These designs have additional hardware points where the light channel meets the shell. Inspect those junctions specifically. Verify your weapon-mounted light is seated correctly before testing retention. Check optic cutouts for stress fractures, especially if the holster sees heavy daily use.
When to Replace
Replace your holster if retention cannot be corrected by cleaning and proper screw adjustment, if any crack reaches a screw hole or the trigger guard area, if the belt clip is bent or hardware is stripped, or if the holster has been stored unused for an extended period and retention geometry has shifted. Quality control data shows that issues like loose fit and retention failure account for approximately 2.4% of holster shipments industry-wide, which underscores why proper maintenance, not just initial quality, determines long-term reliability.
Document any damage with photos and contact the manufacturer directly. A holster showing structural failure is a life-safety item. Treat it that way.
Keep Your Gear as Ready as You Are
Kydex is the most durable, low-maintenance holster material available. But 10 minutes of periodic care is what separates gear that performs under pressure from gear that fails when it counts.
The routine is straightforward: clean out debris before adjusting retention. Adjust retention in quarter-turn increments with blue Loctite on threads. Inspect for cracks and hardware wear on a consistent schedule. That's it.
Our founder, a retired Law Enforcement Officer and Master Firearms Instructor, built C&G Holsters on a simple principle: the gear you trust your life to should be maintained to the same standard you hold yourself to. That discipline is what separates a prepared carrier from someone who just owns a gun.
Audit your holster today using the inspection points above. If it's time for a new one, choose a holster built to the standard your life demands. For all that you hold close.





Hinterlassen Sie einen Kommentar